The Granger Project - Chapter 6: The Powder Room (and the Bathroom That Waited Thirty Years)
I have thought about this room more than any other in the house, and it is the smallest one in it. Some rooms you plan. This one I found, and then I spent the better part of two years wondering if I had made a mistake keeping it at all.
It started during the cleanout, the way most of the best things in this house did. Left behind in the dining room were two Victorian washstands with marble tops. They were dirty. They were worn. The marble clearly needed more help than I knew how to give it. But there was something about them, a real beauty under all of that, and something inside me just said save them. So I did. I saved both, because each one had its own set of problems and I couldn't tell which pieces were fixable, and I figured if it came to it I could borrow parts from one to rescue the other. We carried them out to the house's garage, and there they sat for right around two years, while the whole rest of the renovation happened around them.
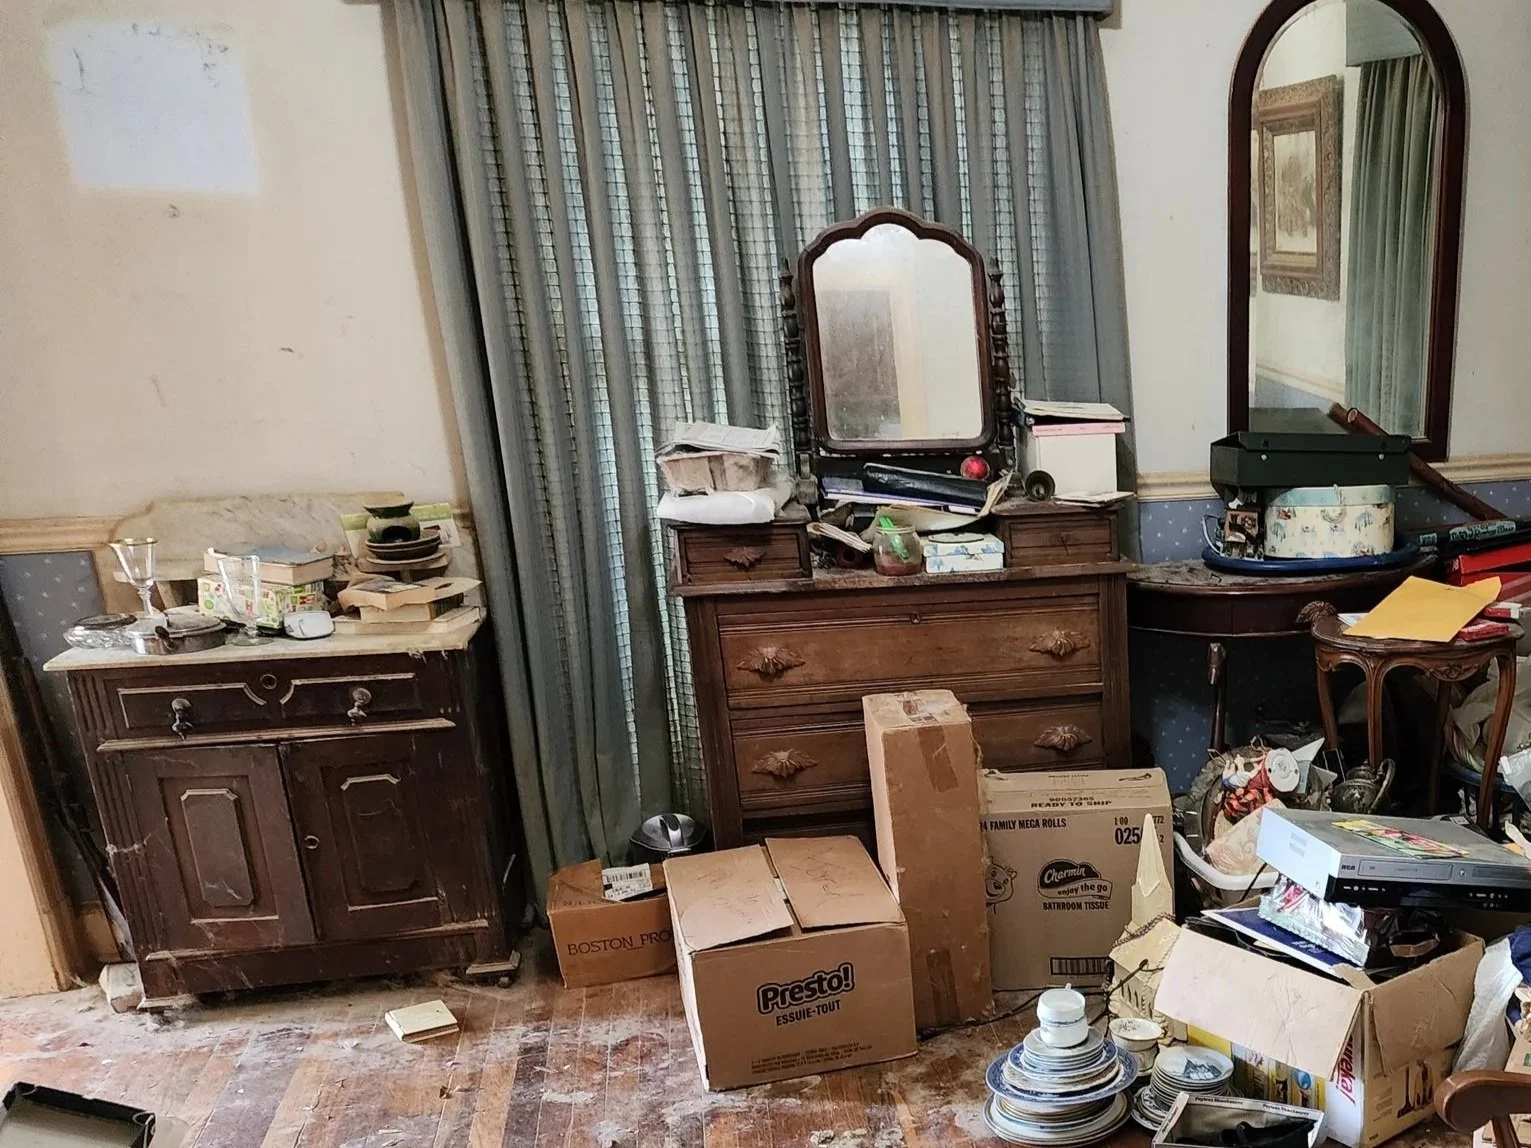
One of the two Victorian washstands as we found it, far left, marble stained and the base dulled by decades of old varnish.
I want to back up and tell you why I needed this room in the first place, because it goes back to a decision I made early. The original house had a powder room on the main floor, the only bathroom down there, and we took it out. We needed that space to open up the kitchen and give it the room it deserved (that's Chapter 4, if you missed it). But I knew from the start I wanted the first floor to have a powder room again. Without one, every guest in the house would have to walk back to the primary bathroom, and when you have company over, that is just not the ideal situation.
So while I was drawing the floor plans for the addition, I found the space for it. A traditional powder room, toilet at one end and the vanity at the other, and the second I saw it come together on paper, I knew. The better of those two washstands was going right there. I had pictured it as a vanity from almost the beginning. What I had not done, through all the framing and every bit of work it took to build the addition, was actually find out whether that dream would hold up in real life. The washstands were still in the garage. And it wasn't until the eleventh hour, with everything else I have going on in a life and a design business, that I finally had the time to pull one out and see.
The Restoration I Wasn't Sure Would Work
I started with the marble top, because that was the part I was most afraid of. I mixed up a paste of baking soda and peroxide, spread it over the stained areas, covered the whole thing in plastic wrap, and left it to sit for about twenty-four hours. I did not have high hopes. When I peeled the wrap back the next day and vacuumed off the dried powder, I actually said something out loud. The top looked amazing. A few small superficial stains were still hanging on, so I wet-sanded those out very, very gently, cleaned it up, and gave it a coat of marble sealer. It looked fantastic. Better than I had let myself imagine in the garage.
Then came the base. I set it up, sanded everything down, and made a small repair to one door with a little wood filler. Once it was stained and had a fresh coat of polyurethane, it looked almost brand new. And here is the part I love, the part you cannot plan for. The old varnish had grown so cloudy and dirty over the years that I could never tell the door and drawer panels on the front were burl wood. As the finish came clean, that grain started shining back through. A detail the original makers put there a hundred-plus years ago, hidden under grime, showing up again like a little gift. I cleaned and polished the original hardware, and just like that, the restoration was done.
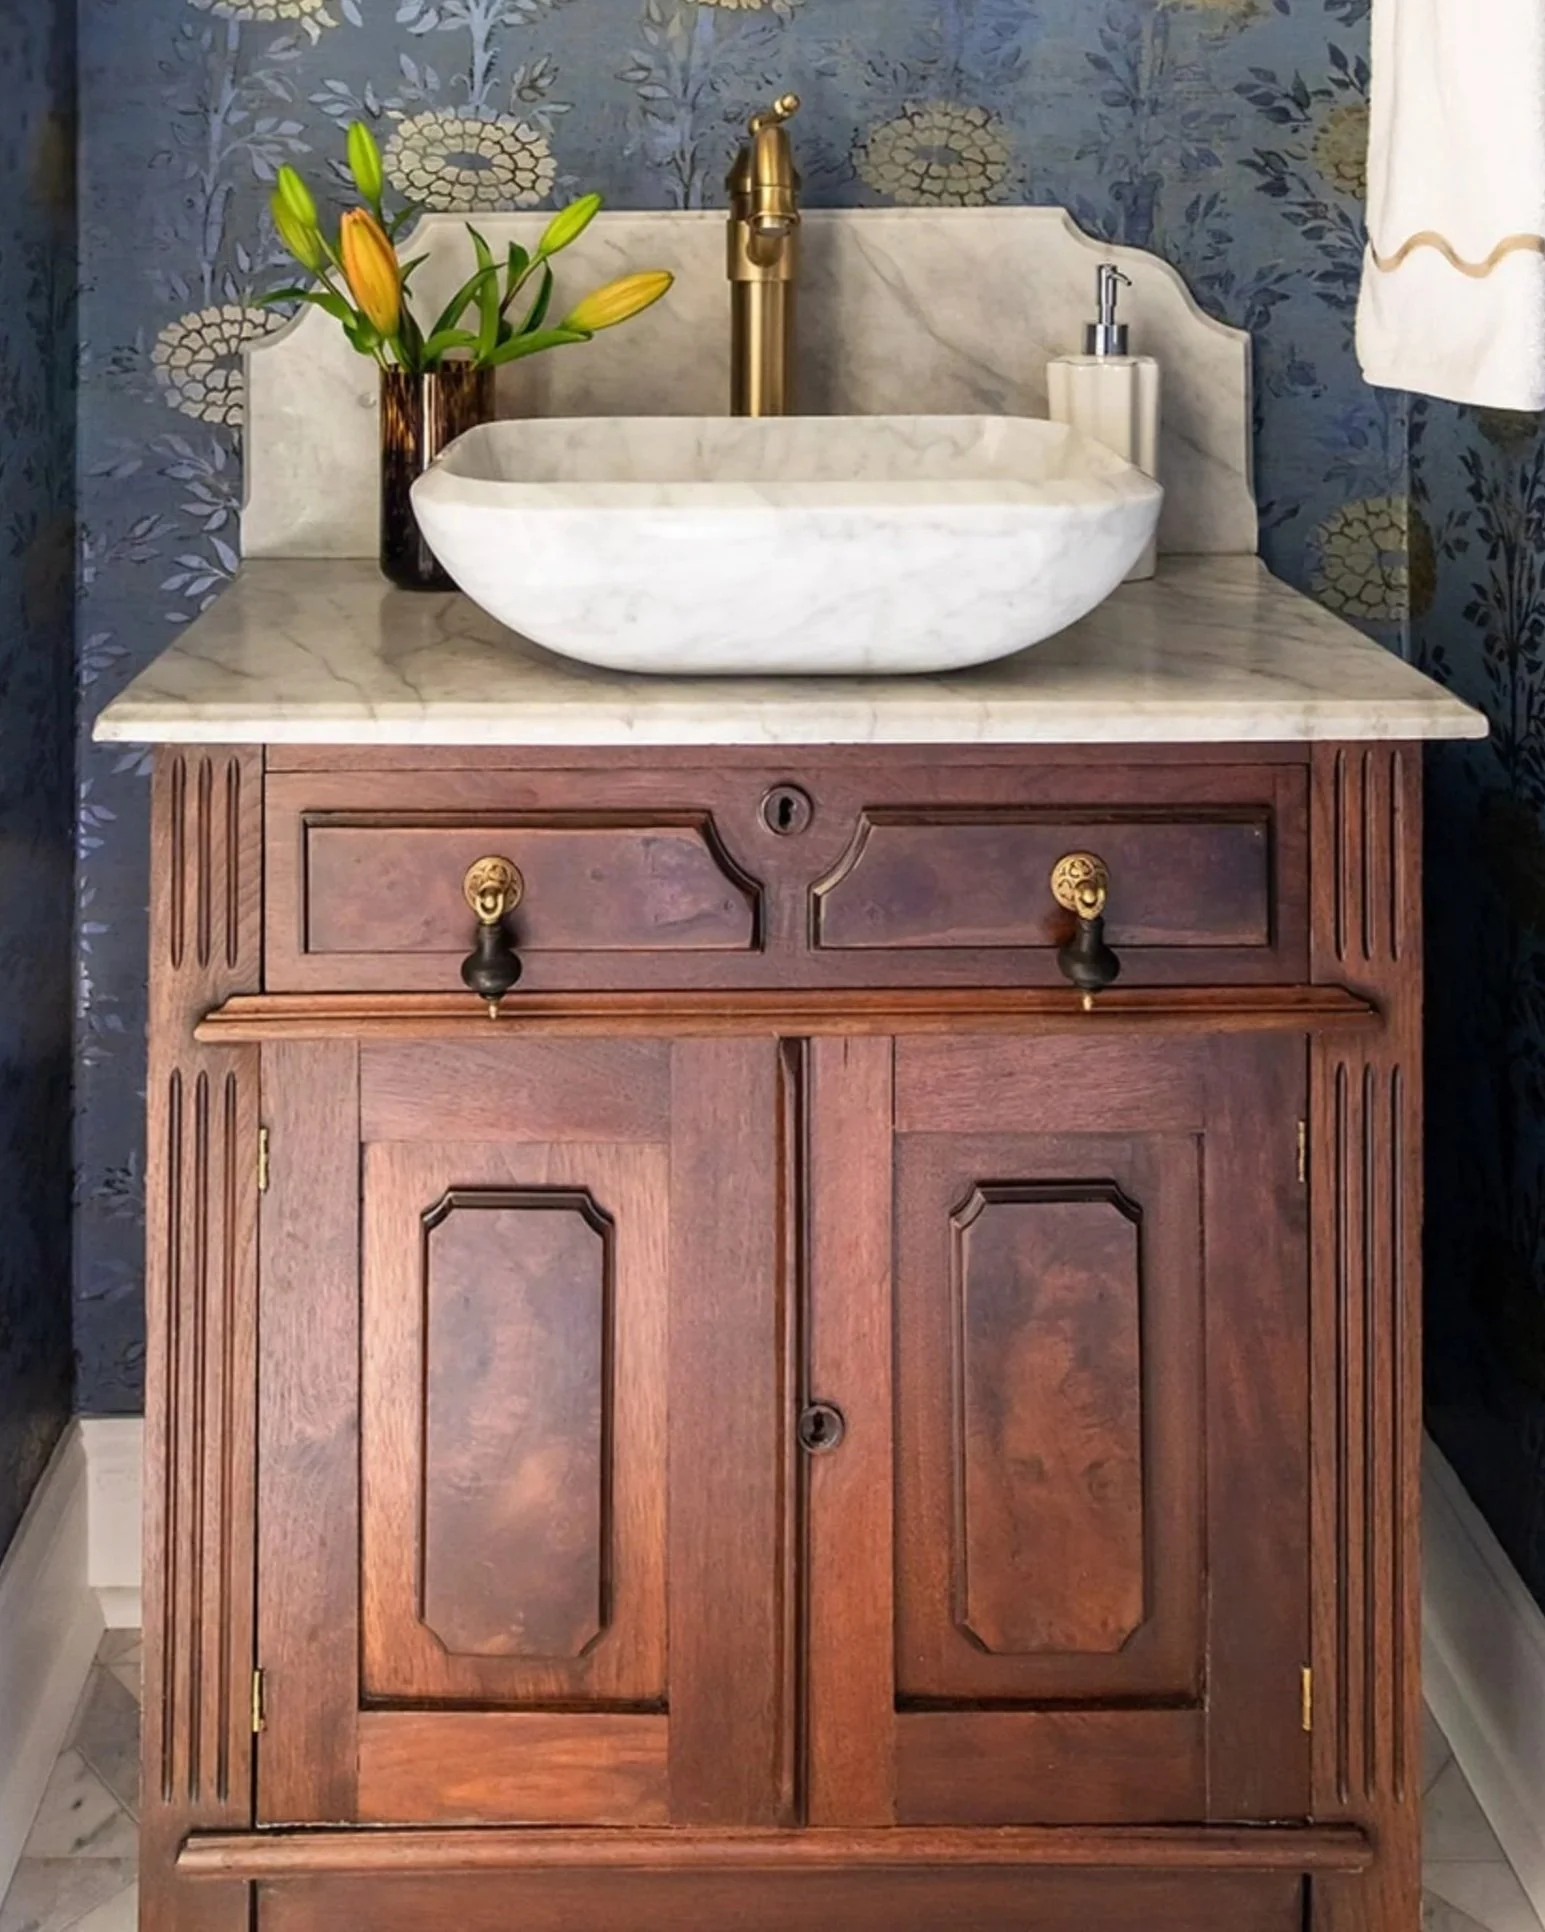
The restored washstand, marble top cleaned and sealed, the base stained, and the burl-wood panels shining through again.
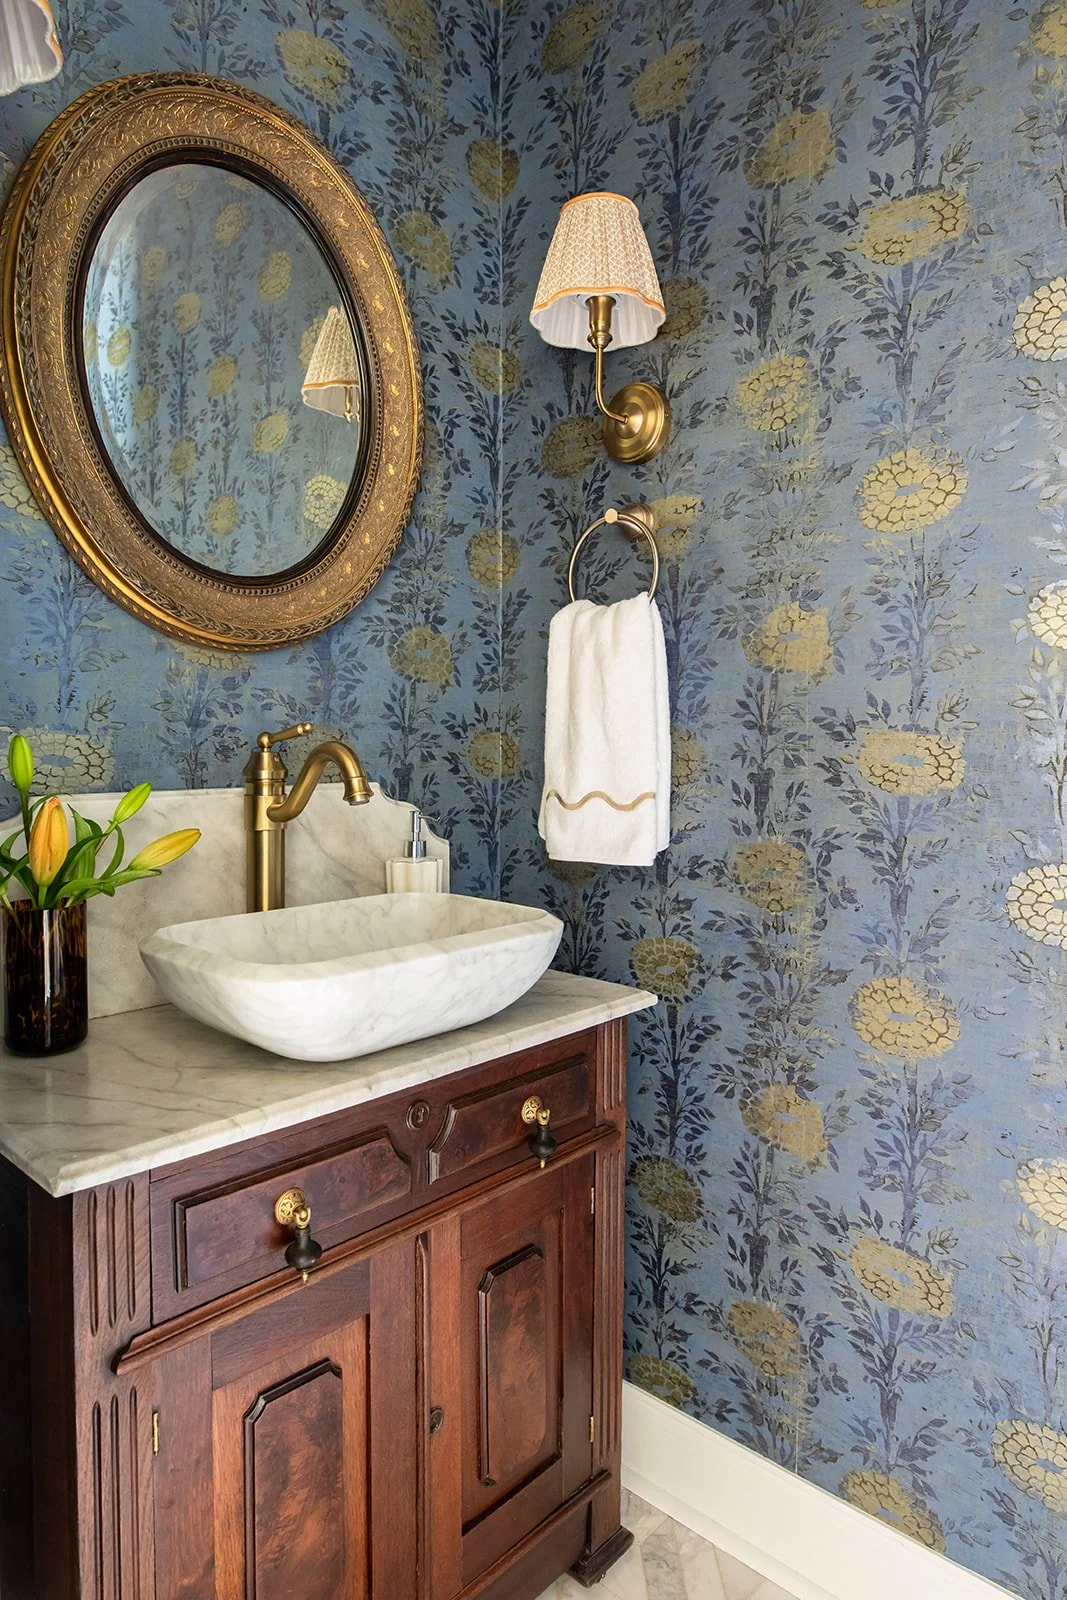
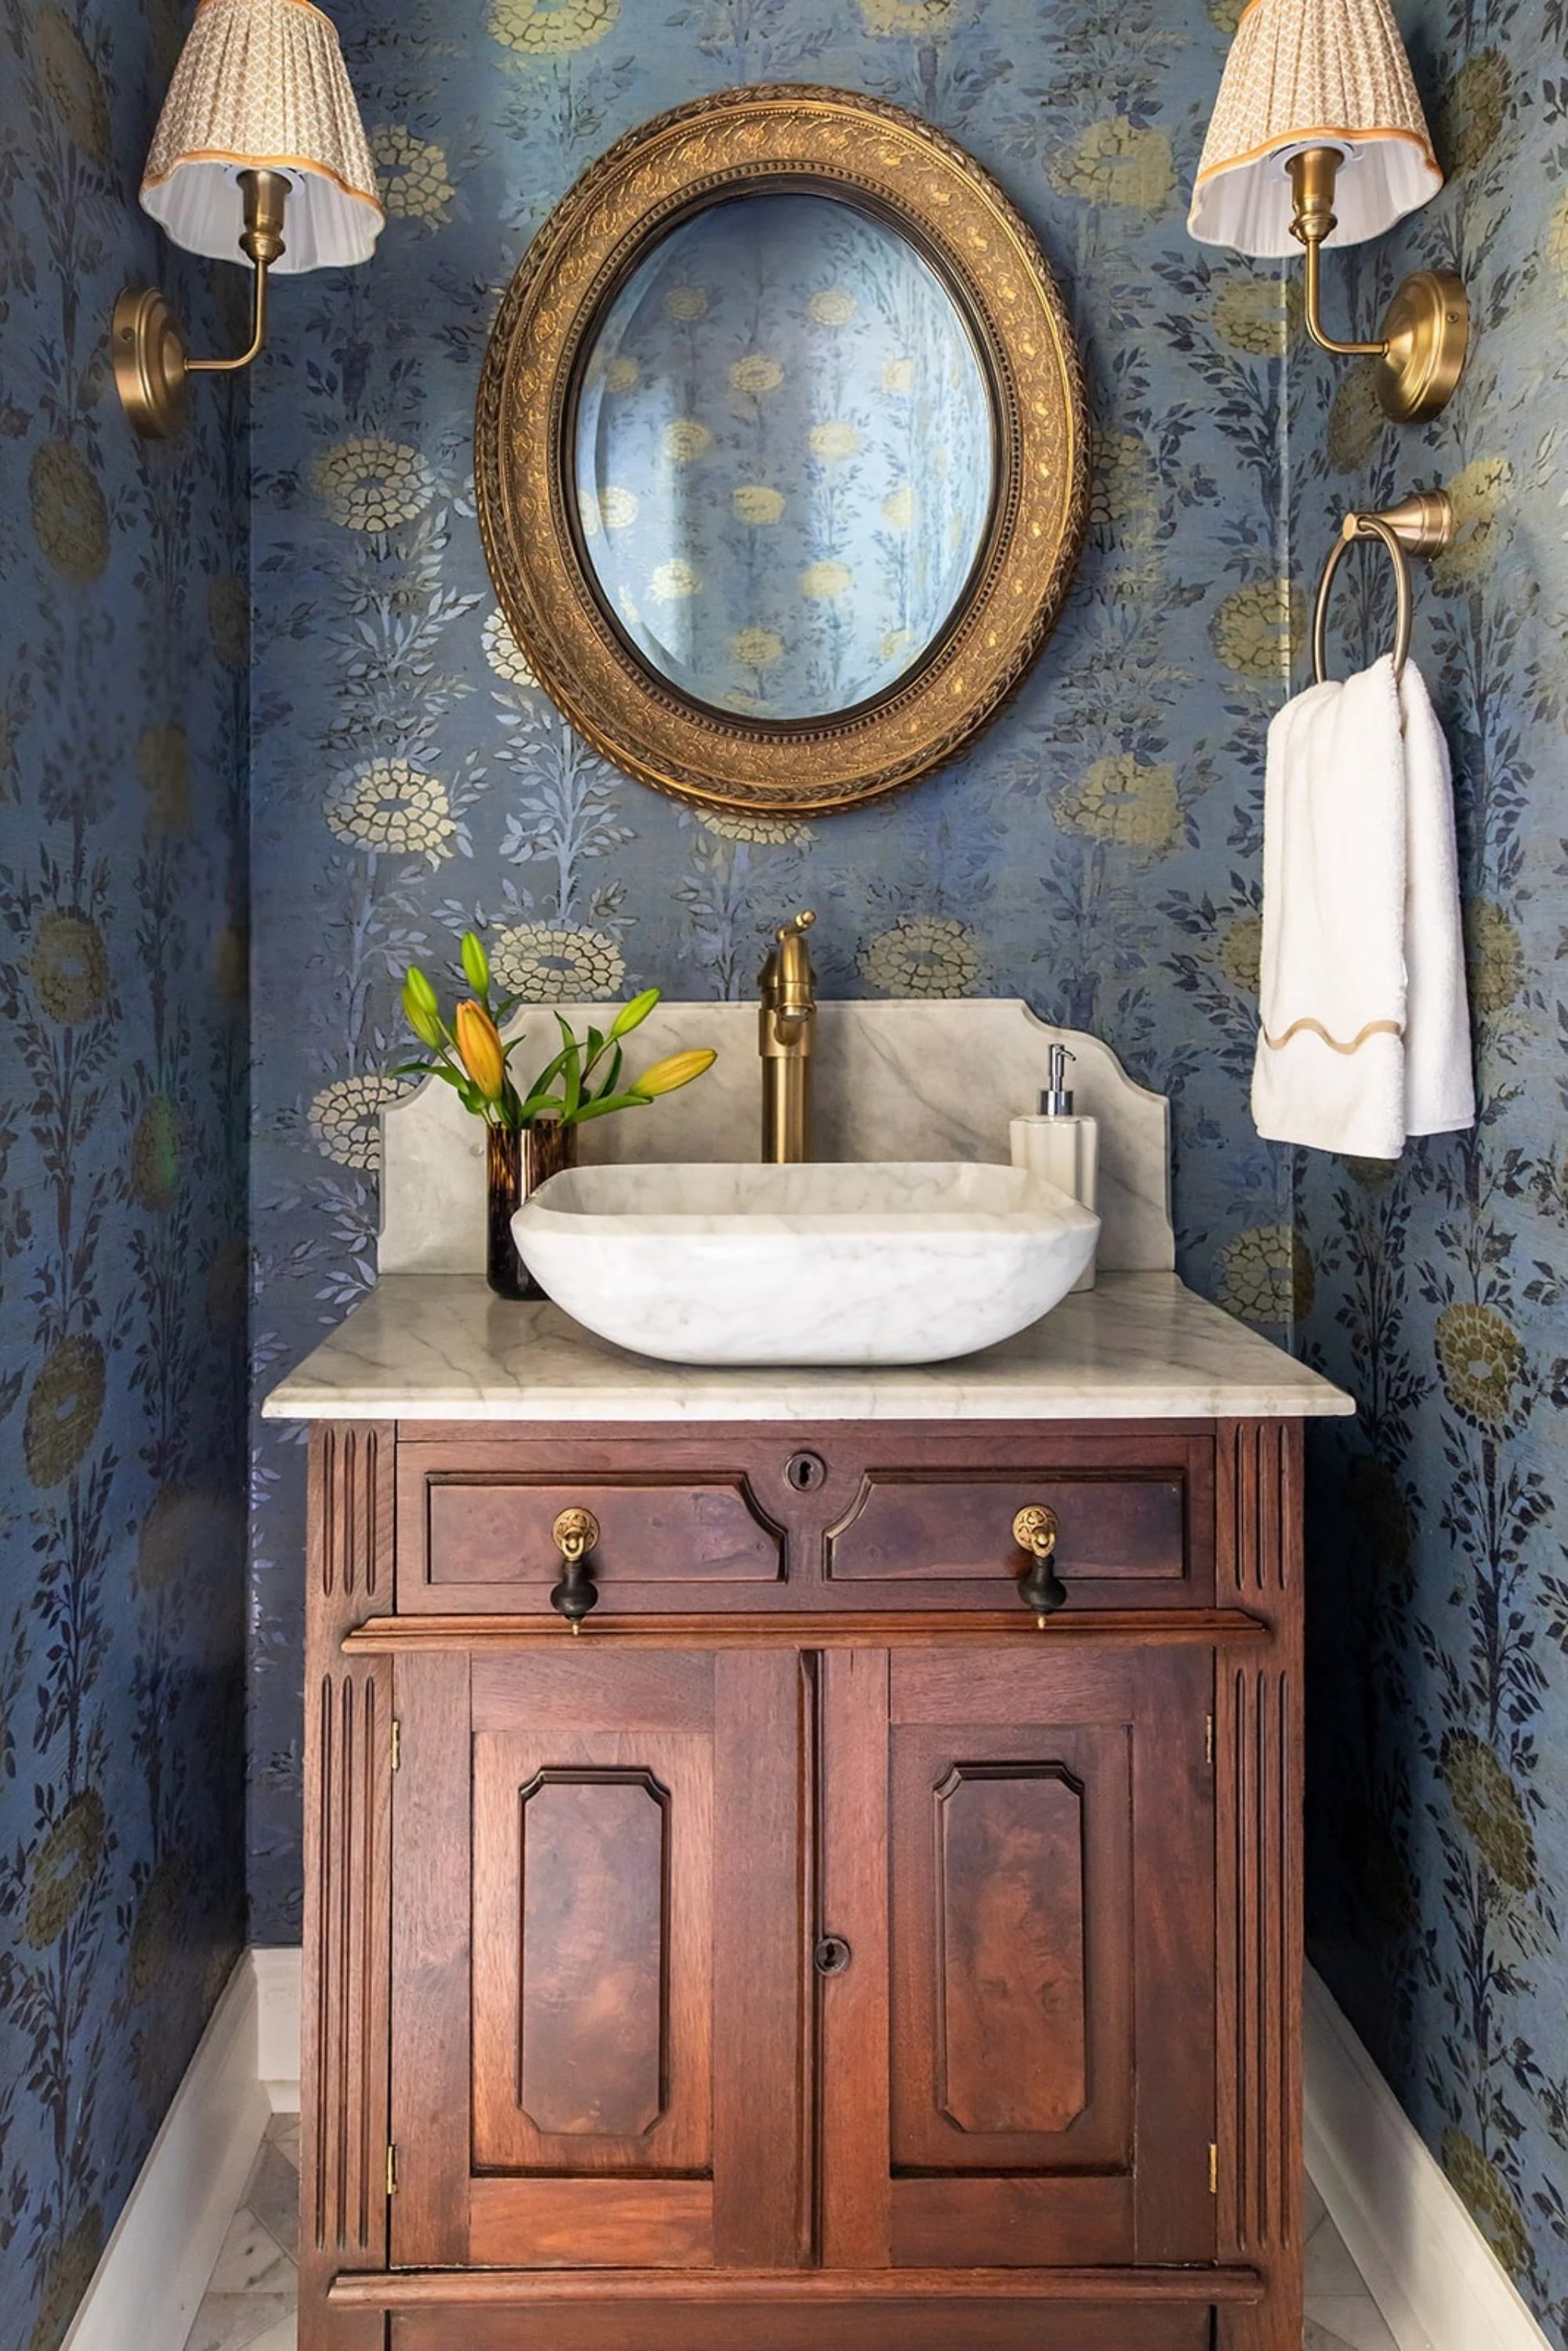
The next hurdle was convincing our plumber that I could really turn an antique washstand into a working vanity. I hunted, and hunted, and hunted for a sink that would sit right on that top as a vessel. I was fairly sure the marble was Carrara, so I went looking for a match, and I finally found a Carrara marble vessel sink from Signature Hardware that could not have been more perfect. It was slim enough to sit properly on the existing washstand top, which was the whole trick. After a bit of drilling and some carpentry inside the vanity to make the plumbing work (thanks to Jared, my wonderful husband, for that), it all came together: a tall, slim brass faucet rising over the marble sink on top of the marble I had saved. It came together beautifully, and just in the nick of time, as these things sometimes do.
Giving the Room Its Drama
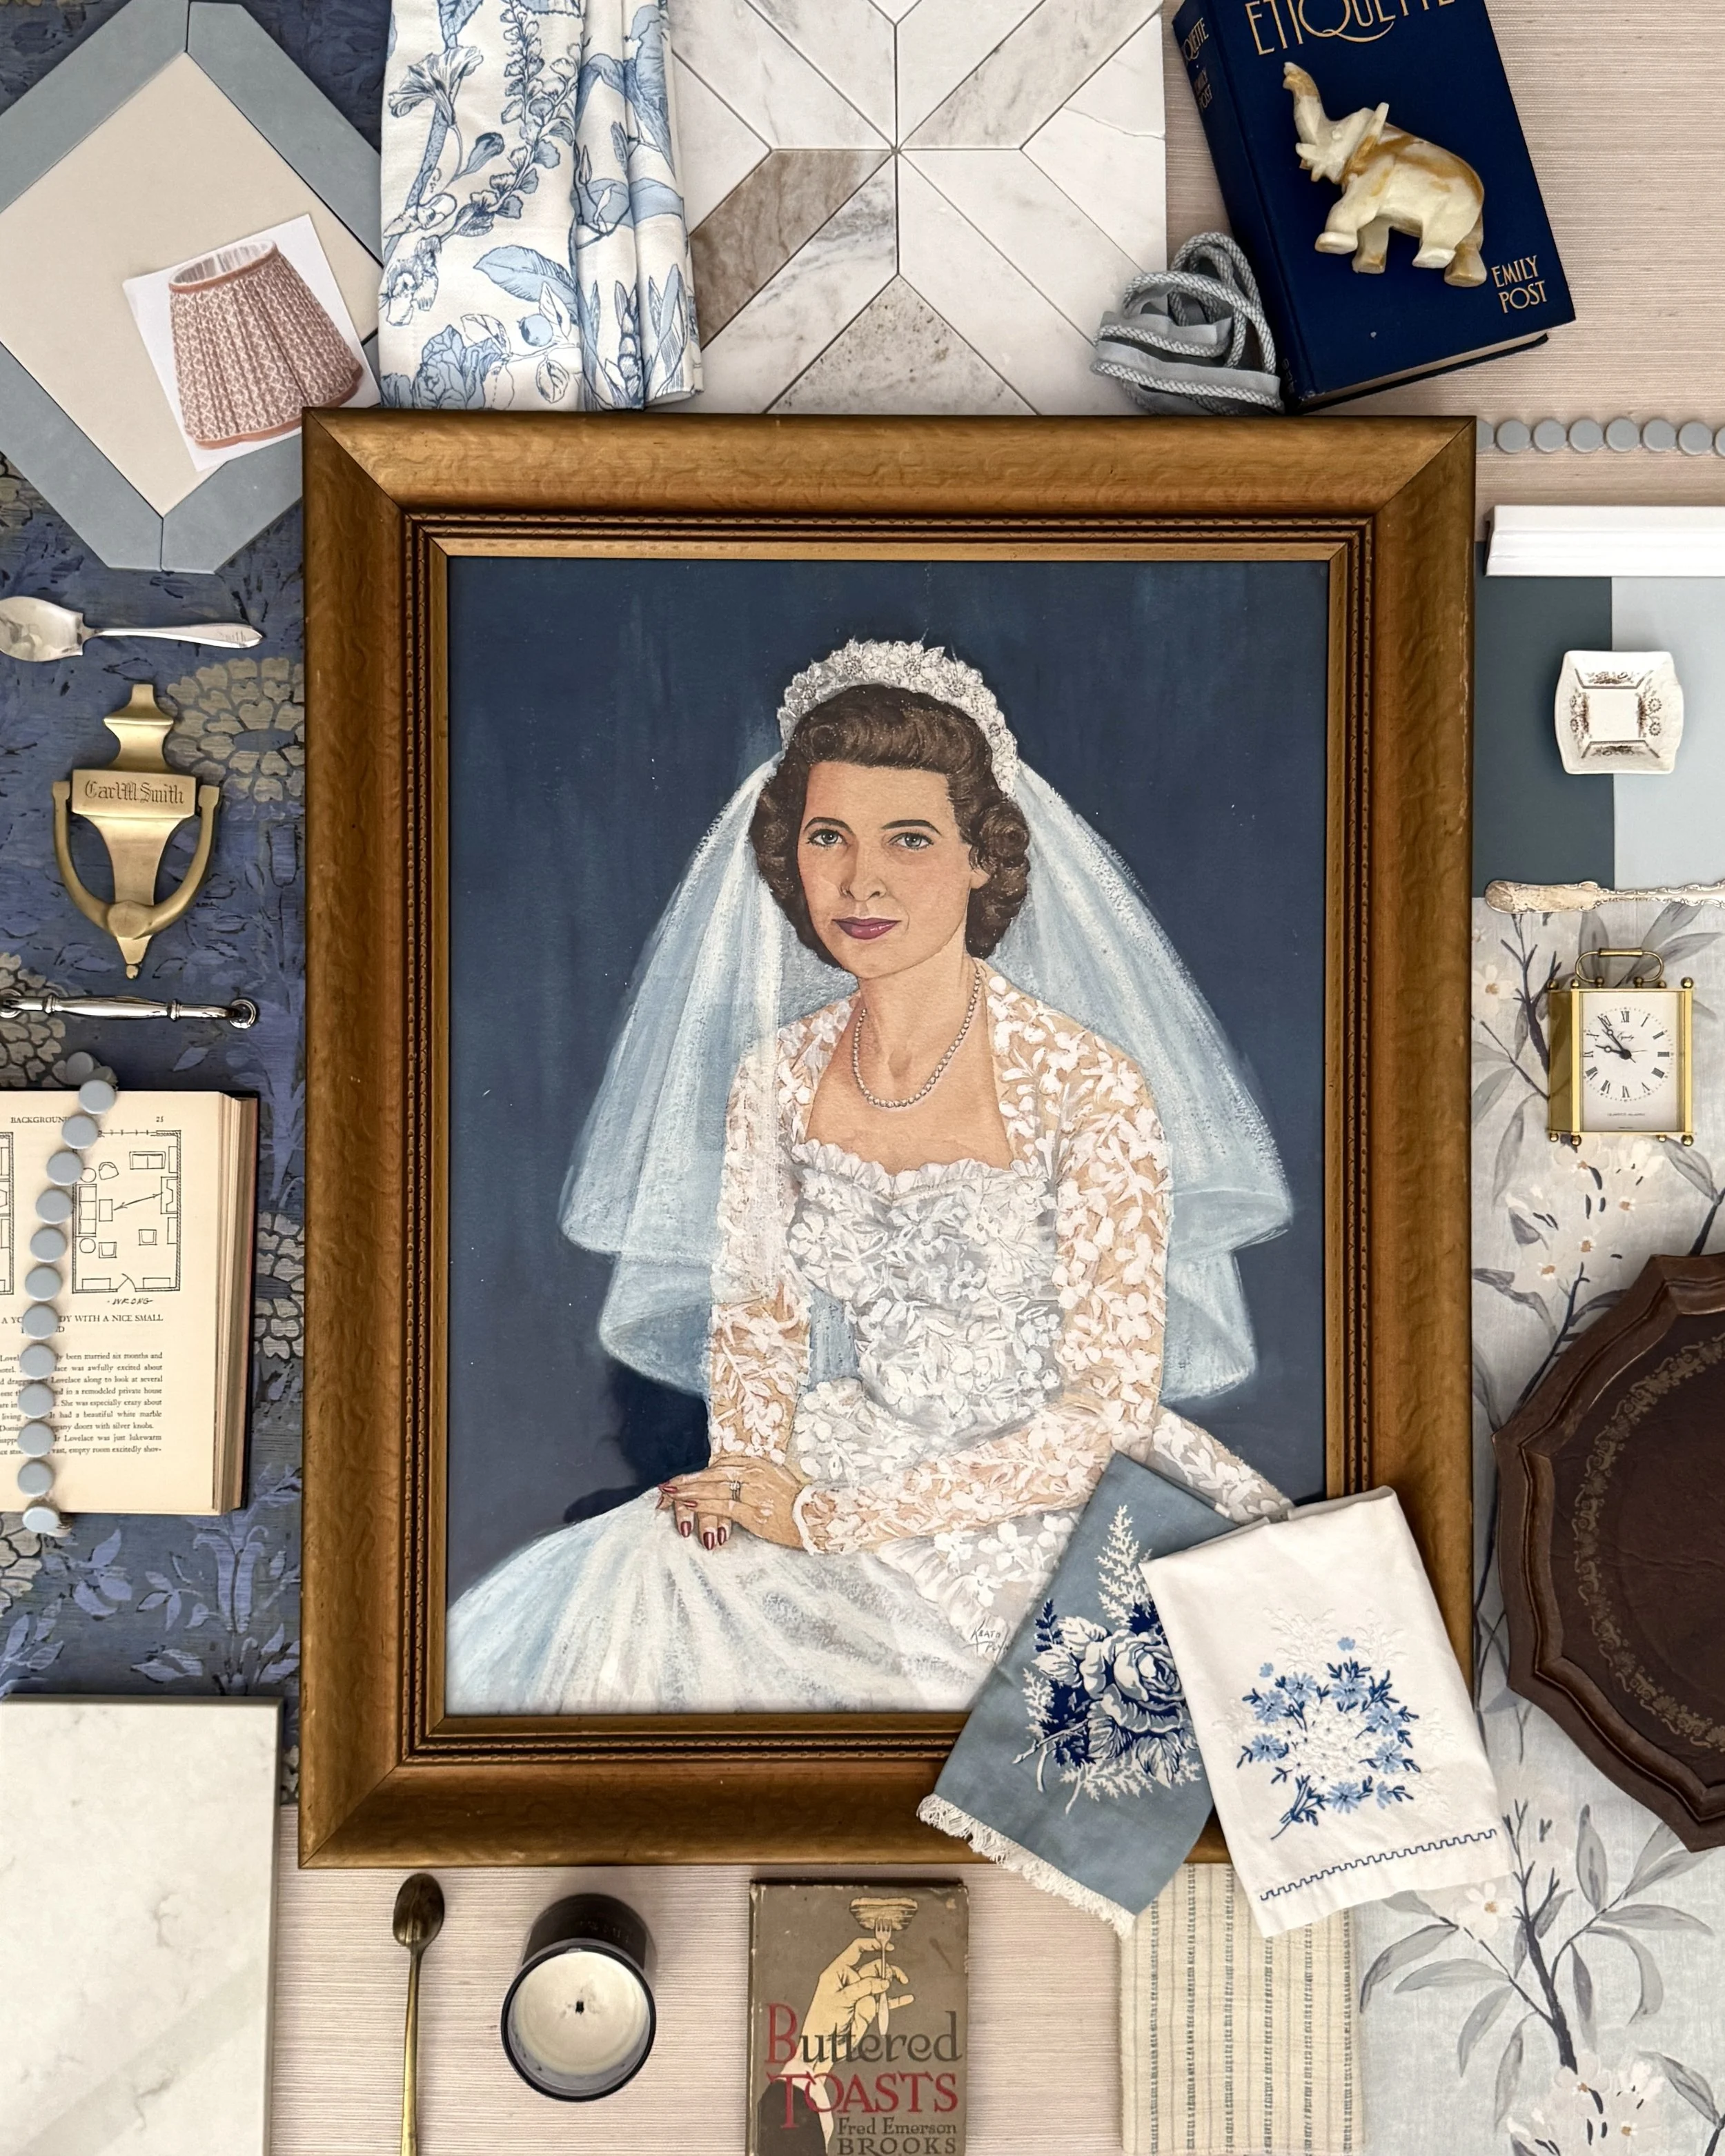
In Chapter 3, I told you about finding Mary Lou Smith's 1952 bridal portrait in the house, the deep blue background and the gold frame. I have always believed a powder room is the perfect little place to be bold, because it is small and no one lives in it all day, so you can give it some drama. I went on the hunt for a wallpaper with some real presence. When I came across a floral chrysanthemum print, I stopped. It looked just like Mary Lou's portrait. The same deep blue, the same flashes of gold metallic sitting on the flowers. I could not have matched it on purpose. Hanging it felt like a quiet homage to her, and honestly, if I were the one living there, I would hang her portrait right in the powder room where you would see it the moment you walked in.
The rest of the room came together from things I had been holding onto and hunting for. The mirror I had found at an estate sale a couple of years earlier, one of those pieces you buy with no plan and hang onto because it is too good to pass, turned out perfect for this bath. I topped the wall sconces with mustard-colored fabric shades from a maker called Mrs. Alice, a warm little counterpoint to all that blue. The floor is marble in a diamond pattern, which ties it back to the laundry, mudroom, and primary bath, so even the smallest room in the house speaks the same language as the rest. It is, I think, one of my very favorite rooms in the whole house. Not bad for a washstand that nearly didn't make it out of the garage.
Upstairs: The Bathroom that Waited Thirty Years
There is one more room I want to bring you into, because its story is almost the opposite of the powder room's. In 1996, the family had a pipe burst, or some kind of water leak, and they started a remodel of the upstairs bathroom that never got finished. So by the time we bought the house in 2022, that bathroom had only a working tub/shower. The toilet and the sink had been pulled out almost thirty years before and never replaced. Walking into a room that had been sitting half-done for three decades was a little eye-opening, I will tell you.
Video of the original upstairs bath before demo.
And then the cleanout handed us the ending. Out in the family's garage, we found a perfectly boxed, pristine Kohler toilet and a porcelain vanity, both bought for that 1996 remodel and never once used. We unboxed them, gave them a little dusting, and had the plumber check that everything was still sound. They were beautiful pieces. At this point I think thirty years earns you the word vintage, so I decided they would finally take their rightful place in the upstairs bathroom, right where they had been meant to go all along.
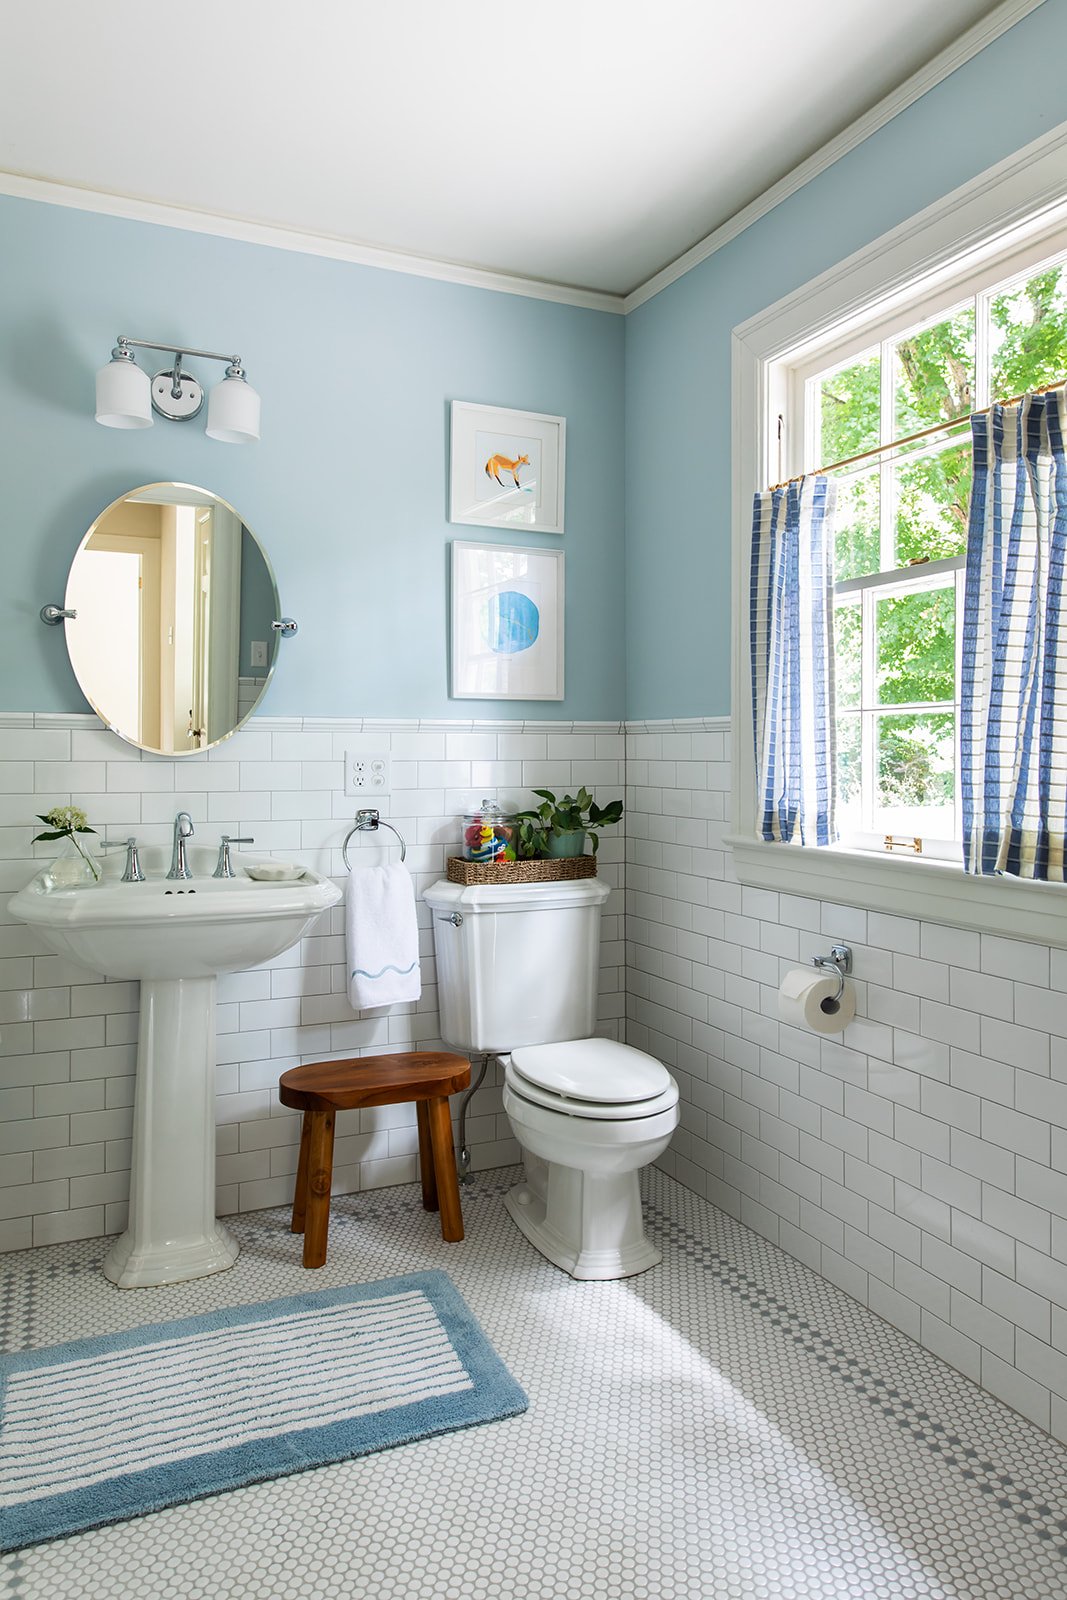
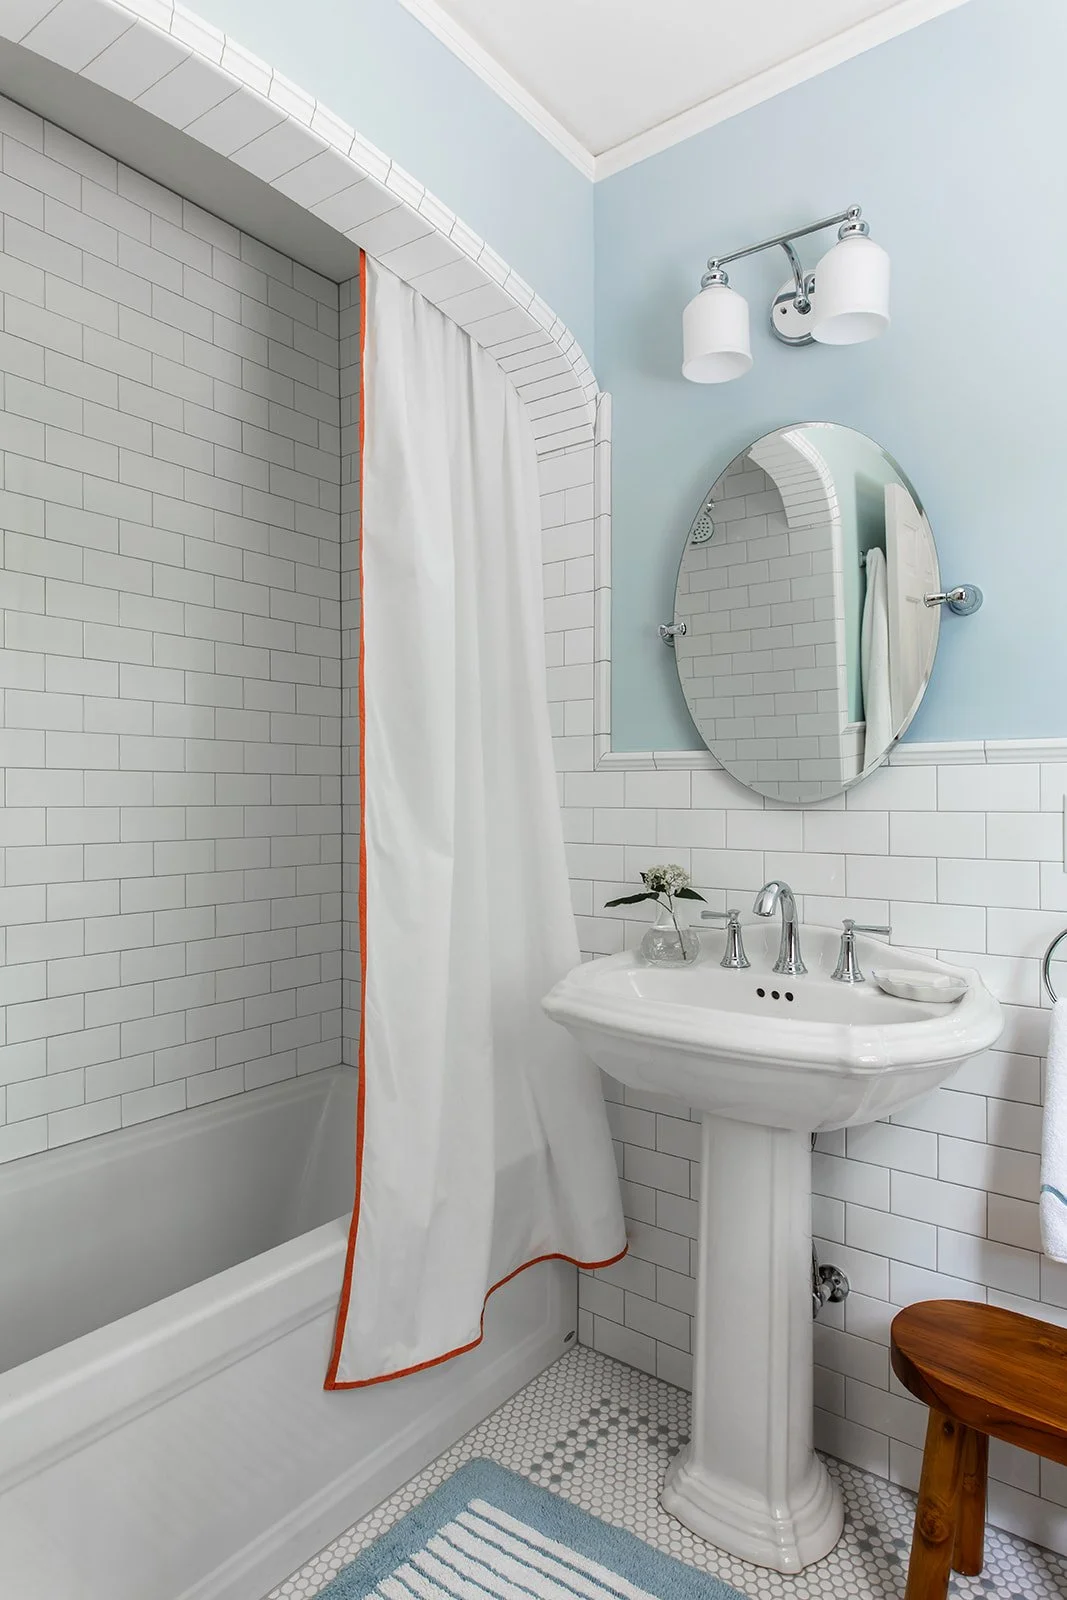
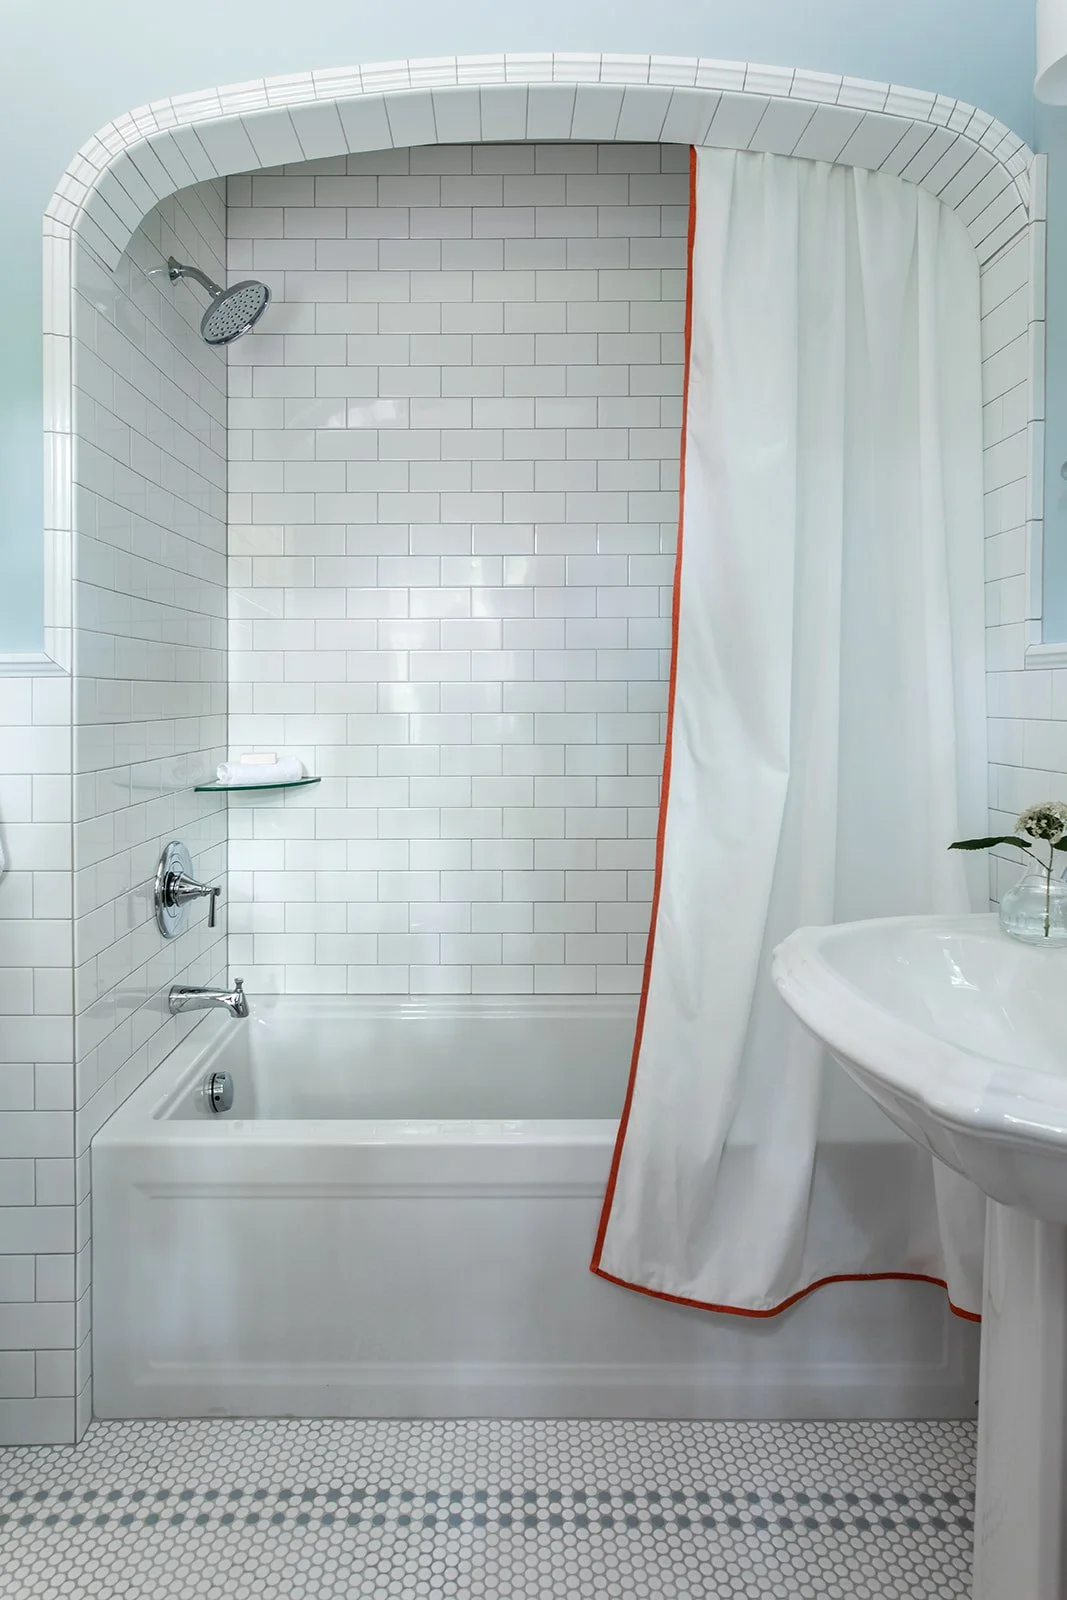
The bathroom also had this beautiful arched alcove where the cast iron tub sat, and I really wanted to save that tub. In this case, it just wasn't possible. It was in rough shape, and having it refinished came with no promise it could actually be brought all the way back, so I replaced it with a close match. I made sure the front of the tub had a nice trim detail instead of a flat, plain apron, because that little bit of character matters in a room like this. Then I got to work on the tile. The bathroom had originally been fully tiled in blue, badly cracked over the years and past saving, so I turned back to Adex, whose line has so many formats and pieces to work with. I ran a three-by-six subway all the way around the walls up to a ceramic chair rail, and that chair rail continues up and around the arch, which is fully tiled. The same three-by-six carries into the tub and shower.
The floor is where this room gets special, and where I got to bring the blue back. It is a white penny tile, and our tile installer, Eric Edwards, one of the best I have ever worked with, painstakingly removed individual white pennies and set blue ones in their place to create a double-line blue border running the whole perimeter of the room. That is no small feat, and it does not count the patience it took to tile around that tub arch on top of it. Highly custom, special work, the kind you only get from someone who cares as much as you do. To finish the room off with one last touch of blue, I painted the upper walls above the tile Brittany Blue by Benjamin Moore, a soft, easy blue that lets the tile do the talking. And once the vintage Kohler fixtures went in, the bathroom that had waited thirty years to be finished finally was.
Two rooms, thirty years apart in their stories, both finished by the same idea I keep coming back to on this house. Sometimes you save a thing and rebuild it. Sometimes you find a thing that was waiting all along. Either way, you are honoring what the house already had in it.
Next week, the final chapter. Everything these three years added up to, in one place. Chapter 7 posts Tuesday, September 1, 2026.
Author's note: I'm sharing the Granger Project one area of the house at a time, not in strict order. The real work spanned three years, and the exterior, interior, and addition all overlapped, so the photos won't always line up with a single moment in time. The facts don't change, just the way I've grouped them.
Finished photos by Kayleigh Gossett.